Plot mesh scopings#
This tutorial shows different commands for plotting mesh entities targeted by mesh scopings.
A mesh scoping is a Scoping with a location related to mesh entities.
The entities shown correspond to the intersection of the IDs in the scoping of the mesh and the IDs in the provided scoping.
If the scoping and the mesh do not have entity IDs in common, nothing is shown.
For example, a scoping on elements associated to a mesh without elements results in an empty plot.
A scoping on node IDs 1 to 2 associated to a mesh whose node IDs start at 3 results in an empty plot.
Note
Scopings of faces are not supported.
PyDPF-Core has a variety of plotting methods for generating 3D plots with Python. These methods use VTK and leverage the PyVista library.
Download tutorial as Python script
Download tutorial as Jupyter notebook
Load data to plot#
For this tutorial, we use mesh information from a case available in the Examples module.
For more information see the Get a mesh from a result file tutorial.
# Import the ``ansys.dpf.core`` module
import ansys.dpf.core as dpf
# Import the examples module
from ansys.dpf.core import examples
# Import the operator module
import ansys.dpf.core.operators as ops

# Download and get the path to an example result file
result_file_path_1 = examples.download_piston_rod()

# Create a model from the result file
model_1 = dpf.Model(data_sources=result_file_path_1)

# Get the mesh of the model
mesh_1 = model_1.metadata.meshed_region
Plot a single mesh scoping#
Create a single Scoping and plot the targeted entities when applied to a single MeshedRegion.
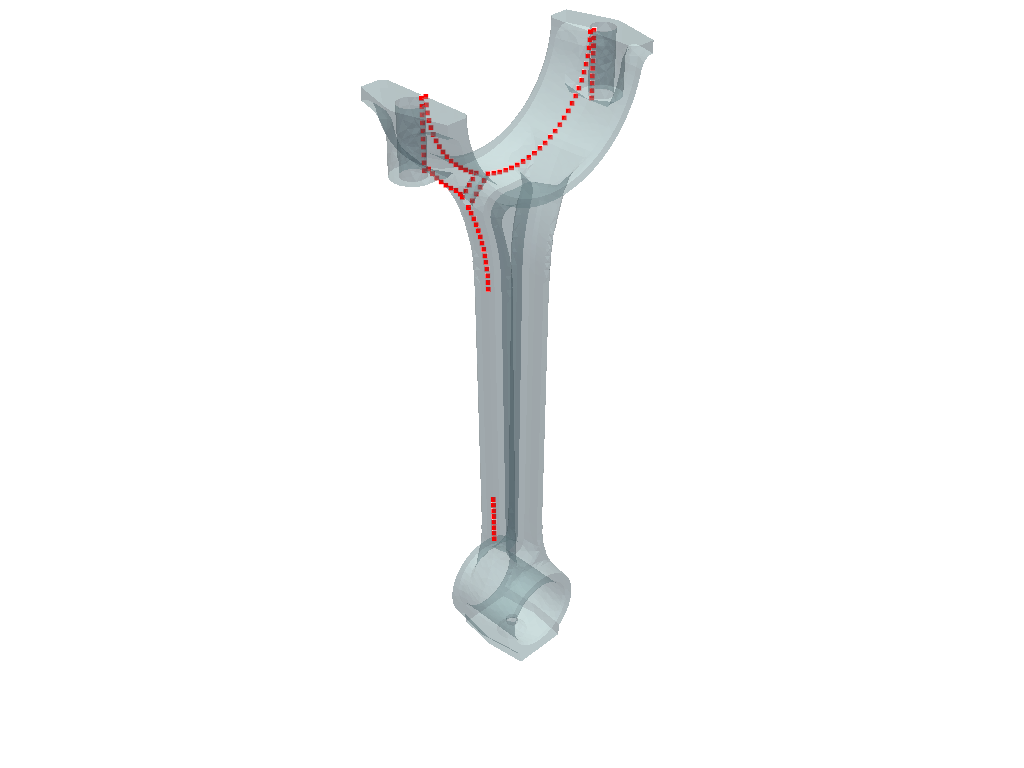
First for a node scoping:
# Create a scoping of the first 100 node IDs of the mesh
node_scoping = dpf.Scoping(location=dpf.locations.nodal, ids=mesh_1.nodes.scoping.ids[0:100])
# Plot the node scoping applied to the mesh, with nodes shown as red dots
node_scoping.plot(mesh=mesh_1, color="red", show_mesh=True)
(None, <pyvista.plotting.plotter.Plotter at 0x1b8c59b7b10>)
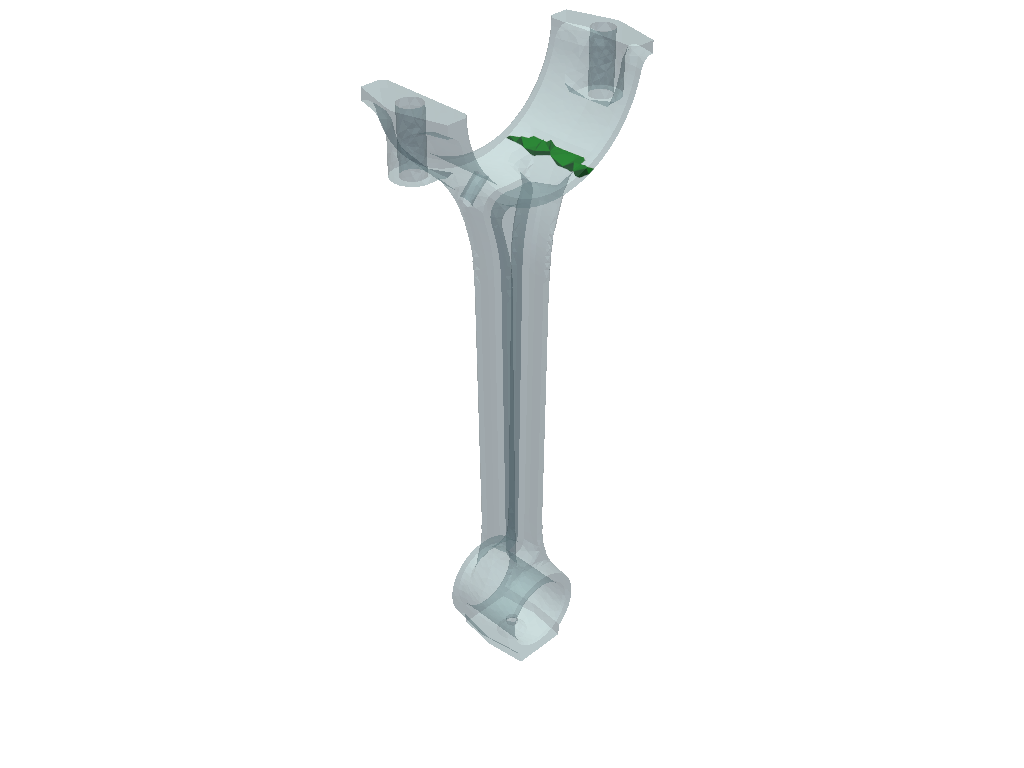
Then for an element scoping:
# Create a scoping of the first 100 elements IDs of the mesh
element_scoping = dpf.Scoping(
    location=dpf.locations.elemental, ids=mesh_1.elements.scoping.ids[0:100]
)
# Plot the element scoping applied to the mesh, with elements shown in green
element_scoping.plot(mesh=mesh_1, color="green", show_mesh=True)
(None, <pyvista.plotting.plotter.Plotter at 0x1b8c9a3a110>)
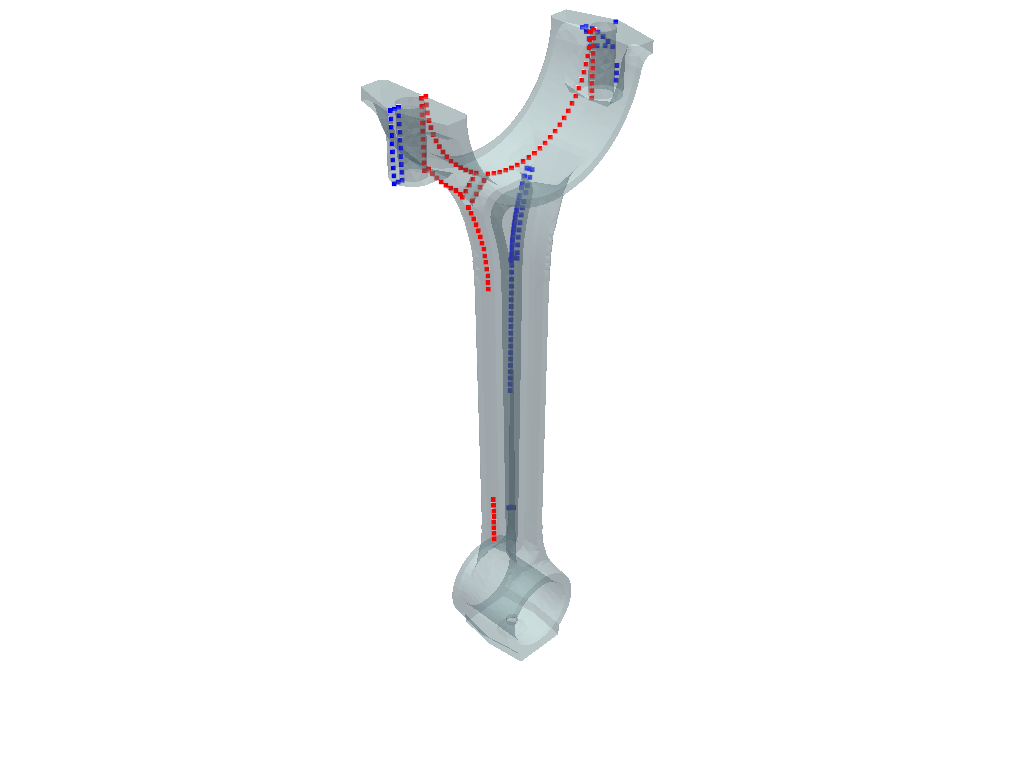
Plot a collection of mesh scopings#
First create a ScopingsContainer with several mesh scopings
and plot targeted entities of a MeshedRegion.
# Create a scoping of the first 100 node IDs of the mesh
node_scoping_1 = dpf.Scoping(location=dpf.locations.nodal, ids=mesh_1.nodes.scoping.ids[0:100])
# Create a scoping of the 300th to 400th node IDs of the mesh
node_scoping_2 = dpf.Scoping(
    location=dpf.locations.nodal, ids=mesh_1.nodes.scoping.ids[300:400]
)
# Create a ScopingsContainer
node_sc = dpf.ScopingsContainer()
# Add at least one label to the collection to identify entries
node_sc.add_label(label="scoping", default_value=1)
# Add the first node scoping to the collection
node_sc.add_scoping(label_space={"scoping": 1}, scoping=node_scoping_1)
# Add the second node scoping to the collection
node_sc.add_scoping(label_space={"scoping": 2}, scoping=node_scoping_2)
# Plot the scoping collection applied to the mesh
node_sc.plot(mesh=mesh_1, show_mesh=True)
(None, <pyvista.plotting.plotter.Plotter at 0x1b8c9b1fa50>)
Then plot the ScopingsContainer applied to a MeshesContainer with similarly labeled meshes.
# Create a collection of meshes based on the initial mesh by splitting it by material
meshes: dpf.MeshesContainer = ops.mesh.split_mesh(mesh=mesh_1, property="mat").eval()
# Create a node scoping targeting the first 100 node IDs of the mesh for material 1
node_scoping_3 = dpf.Scoping(
    location=dpf.locations.nodal,
    ids=meshes.get_mesh({"mat": 1, "body": 1}).nodes.scoping.ids[0:100],
)
# Create a node scoping targeting the first 100 node IDs of the mesh for material 2
node_scoping_4 = dpf.Scoping(
    location=dpf.locations.nodal,
    ids=meshes.get_mesh({"mat": 2, "body": 2}).nodes.scoping.ids[0:100],
)
# Create a collection of scopings
node_sc_2 = dpf.ScopingsContainer()
# Add the appropriate labels to the collection
node_sc_2.add_label(label="mat")
node_sc_2.add_label(label="body")
# Add the scoping associated to material 1
node_sc_2.add_scoping(label_space={"mat": 1, "body": 1}, scoping=node_scoping_3)
# Add the scoping associated to material 2
node_sc_2.add_scoping(label_space={"mat": 2, "body": 2}, scoping=node_scoping_4)
# Plot the collection of scopings applied to the collection of meshes
node_sc_2.plot(mesh=meshes)

(None, <pyvista.plotting.plotter.Plotter at 0x1b8c584d390>)
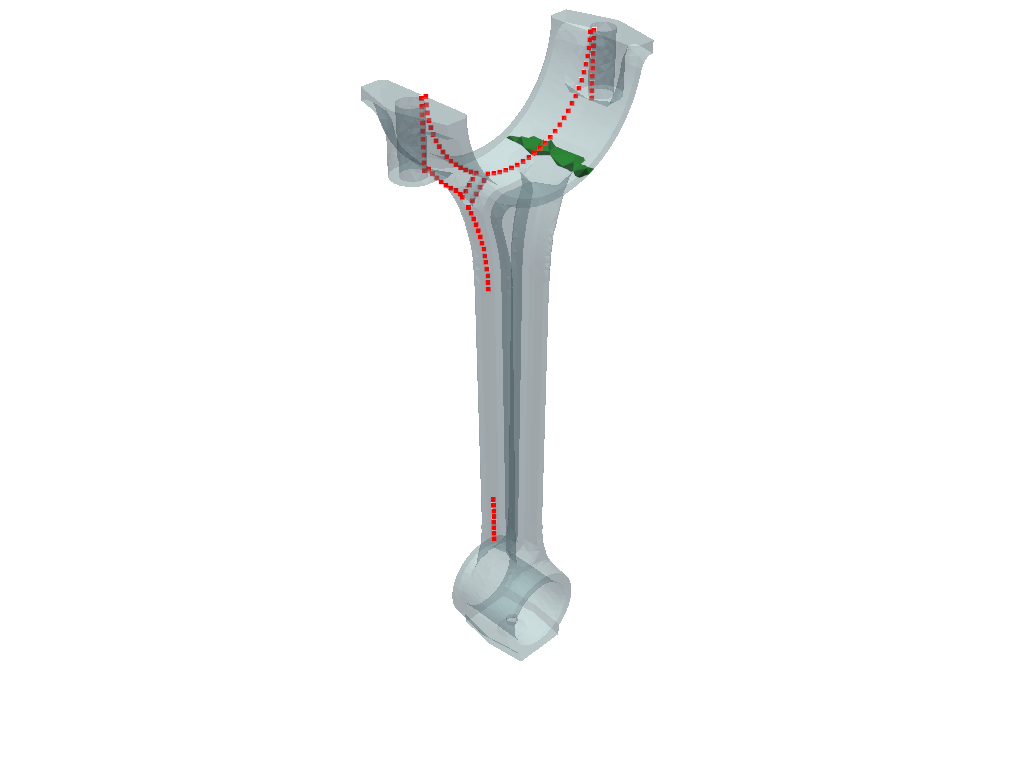
Use DpfPlotter.add_scoping#
We now use the DpfPlotter.add_scoping() to add scopings applied to MeshedRegion to a scene.
# Create a node scoping for the first 100 node IDs of the mesh
node_scoping = dpf.Scoping(location=dpf.locations.nodal, ids=mesh_1.nodes.scoping.ids[0:100])
# Create an element scoping for the first 100 elements IDs of the mesh
element_scoping = dpf.Scoping(
    location=dpf.locations.elemental, ids=mesh_1.elements.scoping.ids[0:100]
)

# Import the DpfPlotter
from ansys.dpf.core.plotter import DpfPlotter

# Instantiate a DpfPlotter
plt = DpfPlotter()
# Tell the plotter to also show the mesh associated with the first scoping
plt.add_scoping(node_scoping, mesh_1, show_mesh=True, color="red")
# Do not show the mesh for the second scoping as it is the same
plt.add_scoping(element_scoping, mesh_1, color="green")
# Show the resulting scene
plt.show_figure()
(None, <pyvista.plotting.plotter.Plotter at 0x1b8c9abe510>)